
Vibe Coding course · lesson 4 of 26
- 1What Is Vibe Coding? A Beginner's Guide
- 2The Vibe Coder Mindset: Build Small, Check Often
- 3Choosing Your Vibe Coding Tool: A Beginner's Guide
- 4Set Up Your Workspace for Vibe Coding
- 5Your First Vibe-Coded App in 30 Minutes
- 6From Idea to MVP: Plan a Small First Version
- 7Spec-Driven Development: Give AI a Clear Plan to Build From
- 8Mockups and Examples as Input: Show AI What You Mean
- 9Choose a Tech Stack: Pick Tools You Can Keep Using
- 10Prompts That Build Things: Give AI a Clear Task
- 11Context Documents: Give AI Lasting Project Instructions
- 12Managing Context and Sessions: Keep AI on the Right Task
- 13Set Standards Early and Review AI Output
- 14Build the Skeleton: Start the BookmarkBox App
- 15Add Data and a Database: Save Real Bookmarks
- 16Add Accounts Safely: Sign In and Protect Each User's Data
- 17Design and Polish: Improve the App One Pass at a Time
- 18Version Control with AI: Keep a Safe History of Your Work
- 19Debugging with AI: Find the Cause Before You Fix It
- 20Test by Default: Make Sure Each Feature Keeps Working
- 21Refactor and Keep Your Code Healthy
- 22Security for Vibe Coders: Protect Your App and Its Users
- 23Deploy Your App: Put BookmarkBox Online
- 24Monitor and Maintain Your App After Launch
- 25Where Vibe Coding Stops: Know When to Change Your Approach
- 26Capstone: Ship a Project from Idea to Production
By the end of this lesson, you will have a safe folder to practise in and know which basic tools your computer needs for this course. You do not need to install every coding tool or learn every terminal command. We will use Claude Code as the main example, and you can follow its installation and sign-in guide when you are ready to set it up.
What you need
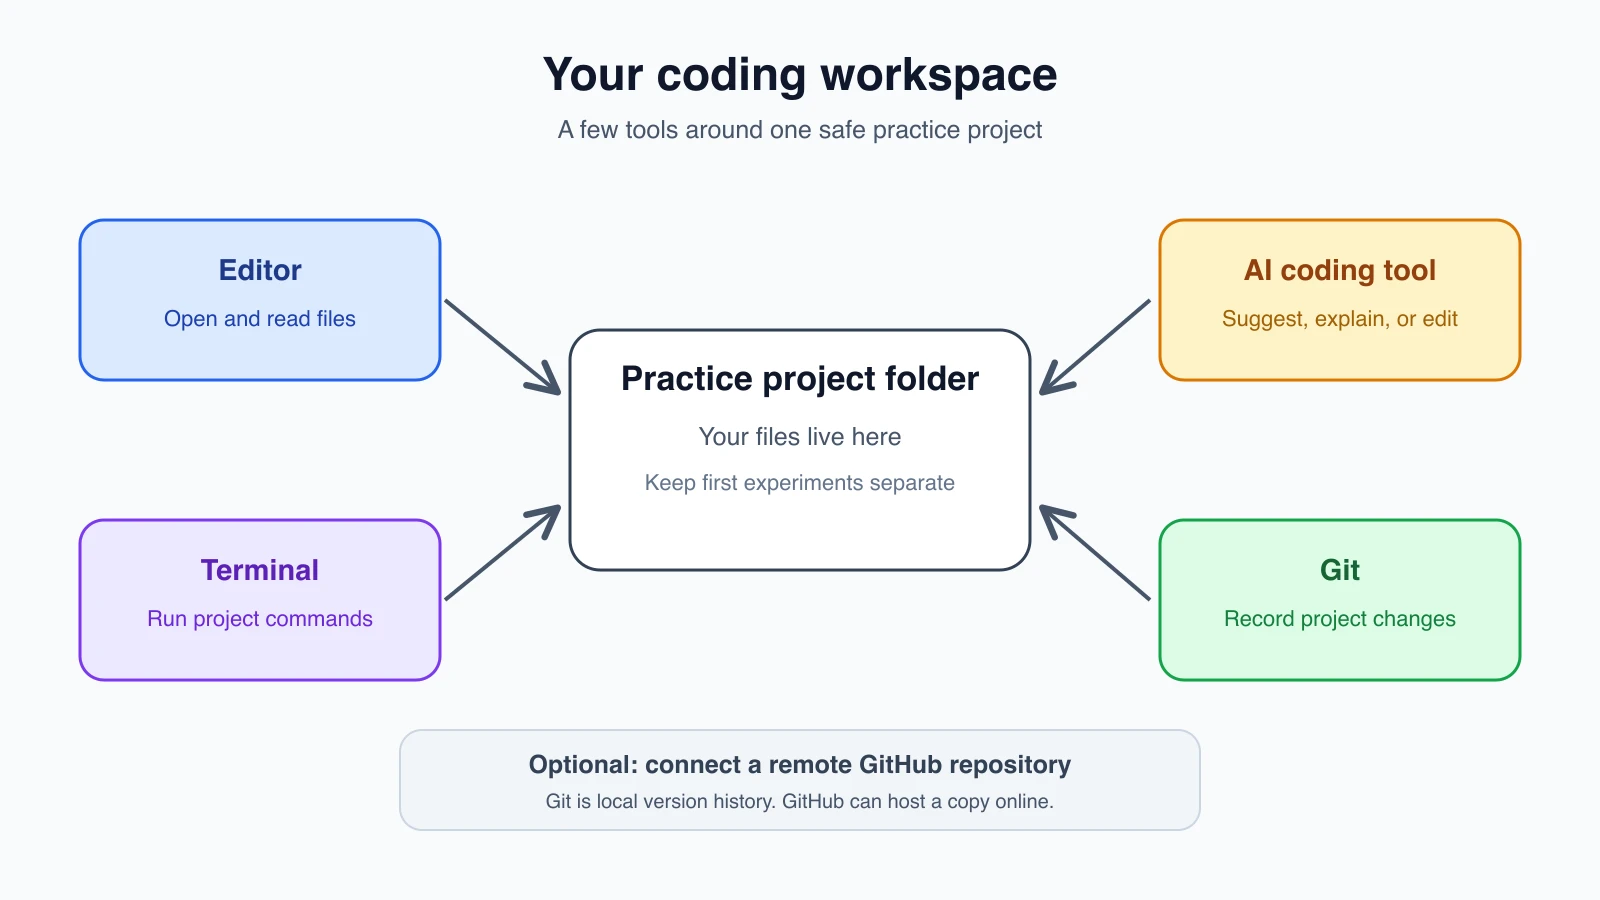
Think of your workspace as a desk for software: a place to see files, run the project and ask an AI tool for help.
- A code editor opens your project files so you can read and change them. Visual Studio Code is one common option. Cursor is another. You can also begin with a browser-based builder, as described in Choosing your tools.
- A terminal is a text window where you type instructions for your computer. On macOS, use Terminal or iTerm; on Windows, use PowerShell or Windows Terminal; on Linux, use your distribution's terminal app. Some editors include a terminal panel, so you can work without switching windows.
- Git records changes to files over time. If an experiment breaks your app, Git can help you see what changed and return to an earlier version.
- GitHub is a website that can host a copy of a Git project and help you share or collaborate on it. It is useful, but not required for a first local experiment.
- Node.js runs JavaScript programs on your computer. Many web projects use it. npm is a package manager included with Node.js that installs the other software a project needs. Claude Code's recommended native installation does not require you to install Node.js; Node and npm are for the web projects you will build in this course.
- One AI coding tool is enough for now. This lesson uses Claude Code, which can work from a terminal, editor, desktop app or browser. Choose the surface that feels comfortable, and follow the current official setup steps.
You do not have to use the exact same editor or terminal shown here. Pick the one that works on your computer. If you are unsure, use the links to official setup guides rather than copying installation commands from a post or video that may be out of date.
Install the basics
1. Choose an editor
Install one editor from its official website, or use the editor already on your computer. Open it once so it can finish its first-run setup. You do not need to add extensions yet.
If you prefer a visual interface and do not want to set up a local project yet, you can start with an app builder. The next lesson builds a tiny app, and it explains the local setup used in the examples.
2. Install Git
Install Git using the instructions for your operating system at git-scm.com. On macOS, Git may be available through Apple's Command Line Tools; Windows users can use Git for Windows; Linux users can use their distribution's package manager. GitHub Desktop is another option and includes Git if you prefer buttons to commands.
Git works on your computer even when you are offline. GitHub is a separate online service. You can create a GitHub account now if you want an online copy of your project, but you can also practise locally and connect it later. If you make an account, verify your email and turn on two-factor authentication, as GitHub recommends.
The first time you use Git, it may ask for your name and email address to label your saved changes. Use the identity you want attached to your project history. The Git setup guide explains how to configure it.
3. Install Node.js and npm
Download the current LTS release from the official Node.js download page. LTS means “Long-Term Support,” a release line intended for stable use over a longer period. The page offers installers for the major operating systems and includes npm with the standard Node.js installation. If a project later asks for a different Node version, follow that project's instructions.
After installation, open a new terminal window and enter:
1node --version
2npm --version
Each command should print a version number. If the terminal says a command is not found, close and reopen the terminal first. If it still cannot find the command, follow the installation troubleshooting guide for your operating system.
4. Choose one way to use Claude Code
Claude Code has several ways to work. The terminal version is a good fit for this course because you can see how the tool interacts with a project. If a terminal feels unfamiliar, its desktop app or editor extension may feel easier. The desktop app includes Claude Code, so you do not need a separate CLI installation to use that route.
Follow the official Claude Code setup guide, or use the step-by-step Installing and signing in lesson. Choose the install steps for your operating system and the surface you want. Do not paste commands for macOS or Linux into PowerShell, or Windows commands into a different shell.
When the setup guide says installation is complete, its terminal instructions use claude --version to check that Claude Code is available. If you use the desktop app instead, open it and sign in as its guide describes.
Make a throwaway practice folder
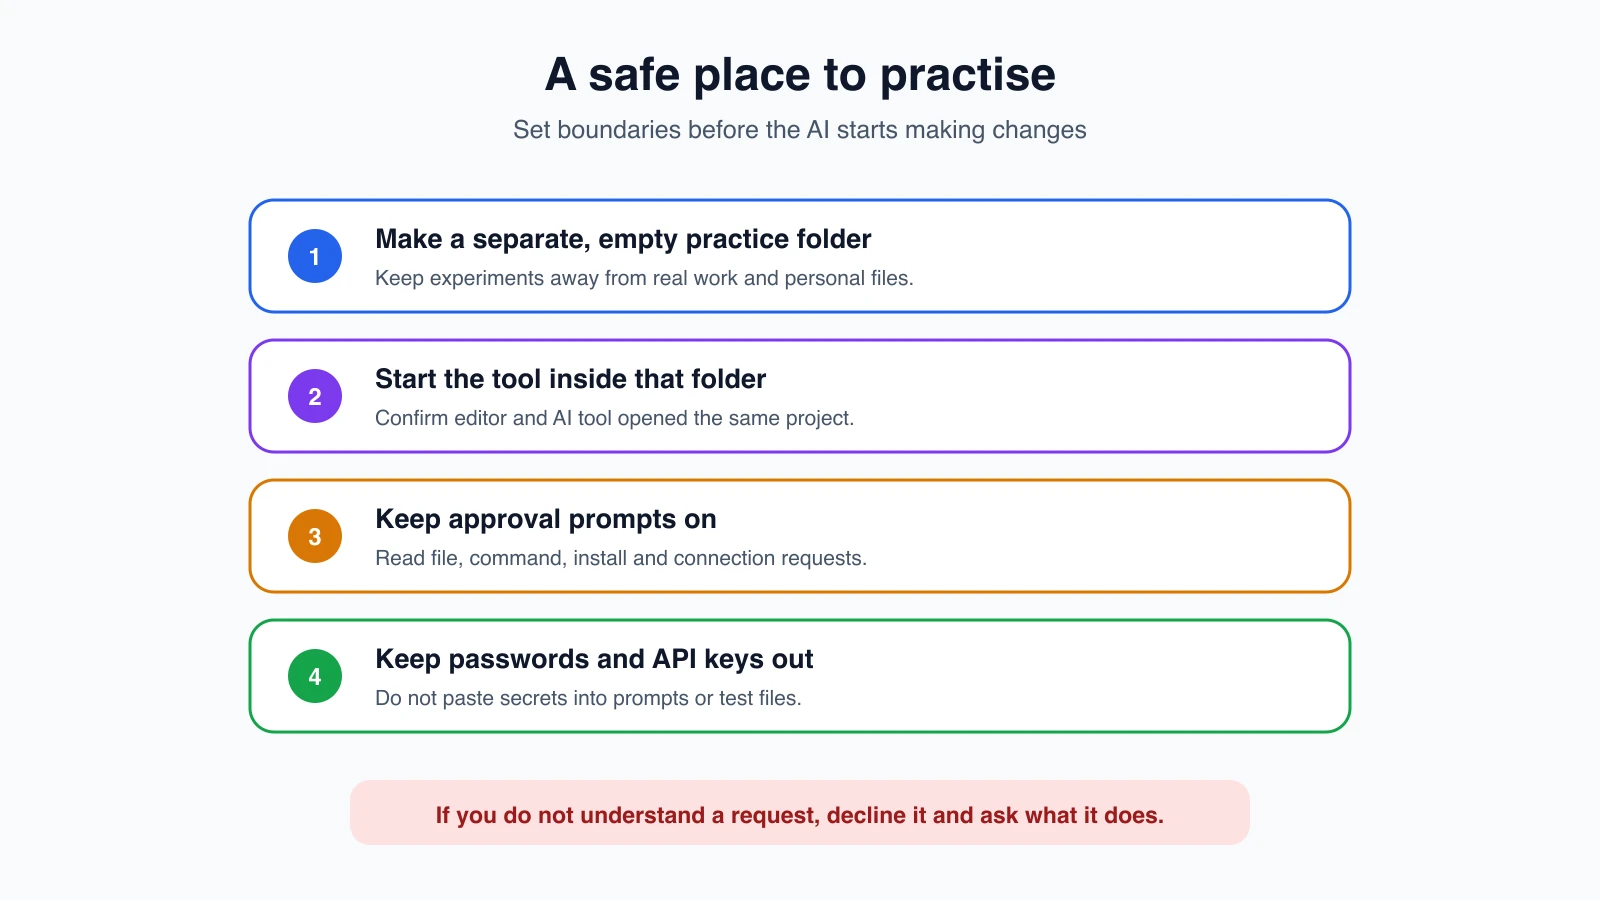
A throwaway folder is a small, separate project folder you can experiment in without putting your real work at risk. Create a new folder somewhere easy to find, such as your Documents folder, and call it vibe-coding-practice. Do not use a folder that contains personal documents, passwords, API keys or a project someone else depends on.
If using the terminal, move into that folder before starting your coding tool. Starting inside the project folder helps the tool focus on the files you mean it to work with. You can also open that folder in your editor and start Claude Code there. For now, keep it empty; the next lesson will give you a small app to build.
Keep permissions simple
Coding agents can read files, change them and sometimes run commands. The exact controls depend on the tool and how you installed it. Start with its standard approval settings. Read a request before approving it, especially when it asks to run a command, install something, access a new location or connect to an outside service.
For Claude Code, its permission guide explains how modes and rules change what it can do. A safe beginner habit is to work in the practice folder, leave approval prompts enabled, and say no when you do not understand a request. Avoid options that skip approvals while you are learning. You can study the available modes in Claude Code permission modes.
Never paste a password, private key or secret API token into a prompt or save it in a file just to make an experiment work. Later in the course, you will learn how to handle secrets more safely.
Check your workspace
If you chose the terminal setup, these commands check that the main tools can be found:
1node --version
2npm --version
3git --version
4claude --version
You should see a version number after each command for the tools you installed. The first three check Node.js, npm and Git; the last checks the Claude Code command-line tool. If you chose the desktop app instead, check that it opens and that you can sign in. You are ready to start when your editor can open the practice folder and your chosen AI tool can work with it.
Tool installers and screen layouts change. If a command fails, check the linked official setup page for the latest steps rather than trying a command from an unknown source. Keep the project folder, editor and AI tool consistent: open the same practice folder in each.
Mistakes beginners make
- Installing several AI tools before trying one. Pick one and learn its basic workflow first.
- Using the home folder or a real project for your first experiment. Make a separate practice folder so an early mistake is easy to contain.
- Assuming GitHub and Git are the same thing. Git tracks changes on your computer; GitHub can host a remote copy and collaboration features.
- Installing an old Node version from an old tutorial. Check the official download page and use the current LTS release unless your project says otherwise.
- Approving every request to get past a prompt. Read what the tool wants to do and skip requests you cannot explain.
- Saving passwords or API keys in the practice project. Keep secrets out of prompts and files, even in a test app.
Recap and try it yourself
Set up one editor, Git, Node.js with npm, and one AI coding tool. Open a separate practice folder, check that the tools you chose are available, and leave approval prompts on. GitHub is optional for the first local experiment, but it is useful when you want an online copy.
Try it yourself: create the empty vibe-coding-practice folder and open it in your editor. If you use the terminal, run the version checks above. In Your first vibe-coded app in 30 minutes, you will use that workspace to build a small, disposable app.