
Vibe Coding course · lesson 5 of 26
- 1What Is Vibe Coding? A Beginner's Guide
- 2The Vibe Coder Mindset: Build Small, Check Often
- 3Choosing Your Vibe Coding Tool: A Beginner's Guide
- 4Set Up Your Workspace for Vibe Coding
- 5Your First Vibe-Coded App in 30 Minutes
- 6From Idea to MVP: Plan a Small First Version
- 7Spec-Driven Development: Give AI a Clear Plan to Build From
- 8Mockups and Examples as Input: Show AI What You Mean
- 9Choose a Tech Stack: Pick Tools You Can Keep Using
- 10Prompts That Build Things: Give AI a Clear Task
- 11Context Documents: Give AI Lasting Project Instructions
- 12Managing Context and Sessions: Keep AI on the Right Task
- 13Set Standards Early and Review AI Output
- 14Build the Skeleton: Start the BookmarkBox App
- 15Add Data and a Database: Save Real Bookmarks
- 16Add Accounts Safely: Sign In and Protect Each User's Data
- 17Design and Polish: Improve the App One Pass at a Time
- 18Version Control with AI: Keep a Safe History of Your Work
- 19Debugging with AI: Find the Cause Before You Fix It
- 20Test by Default: Make Sure Each Feature Keeps Working
- 21Refactor and Keep Your Code Healthy
- 22Security for Vibe Coders: Protect Your App and Its Users
- 23Deploy Your App: Put BookmarkBox Online
- 24Monitor and Maintain Your App After Launch
- 25Where Vibe Coding Stops: Know When to Change Your Approach
- 26Capstone: Ship a Project from Idea to Production
By the end of this lesson, you will have built and tried a tiny tip calculator with an AI coding tool. You will practise the whole loop once: describe what you want, run the result, check it, ask for one change and save a working version. This app is a disposable exercise, not the BookmarkBox project we will build later.
If your workspace is not ready yet, follow Set up your workspace first. This example uses Claude Code, but the prompt and checking steps work in other coding agents and app builders too. Button names and screens differ by tool.
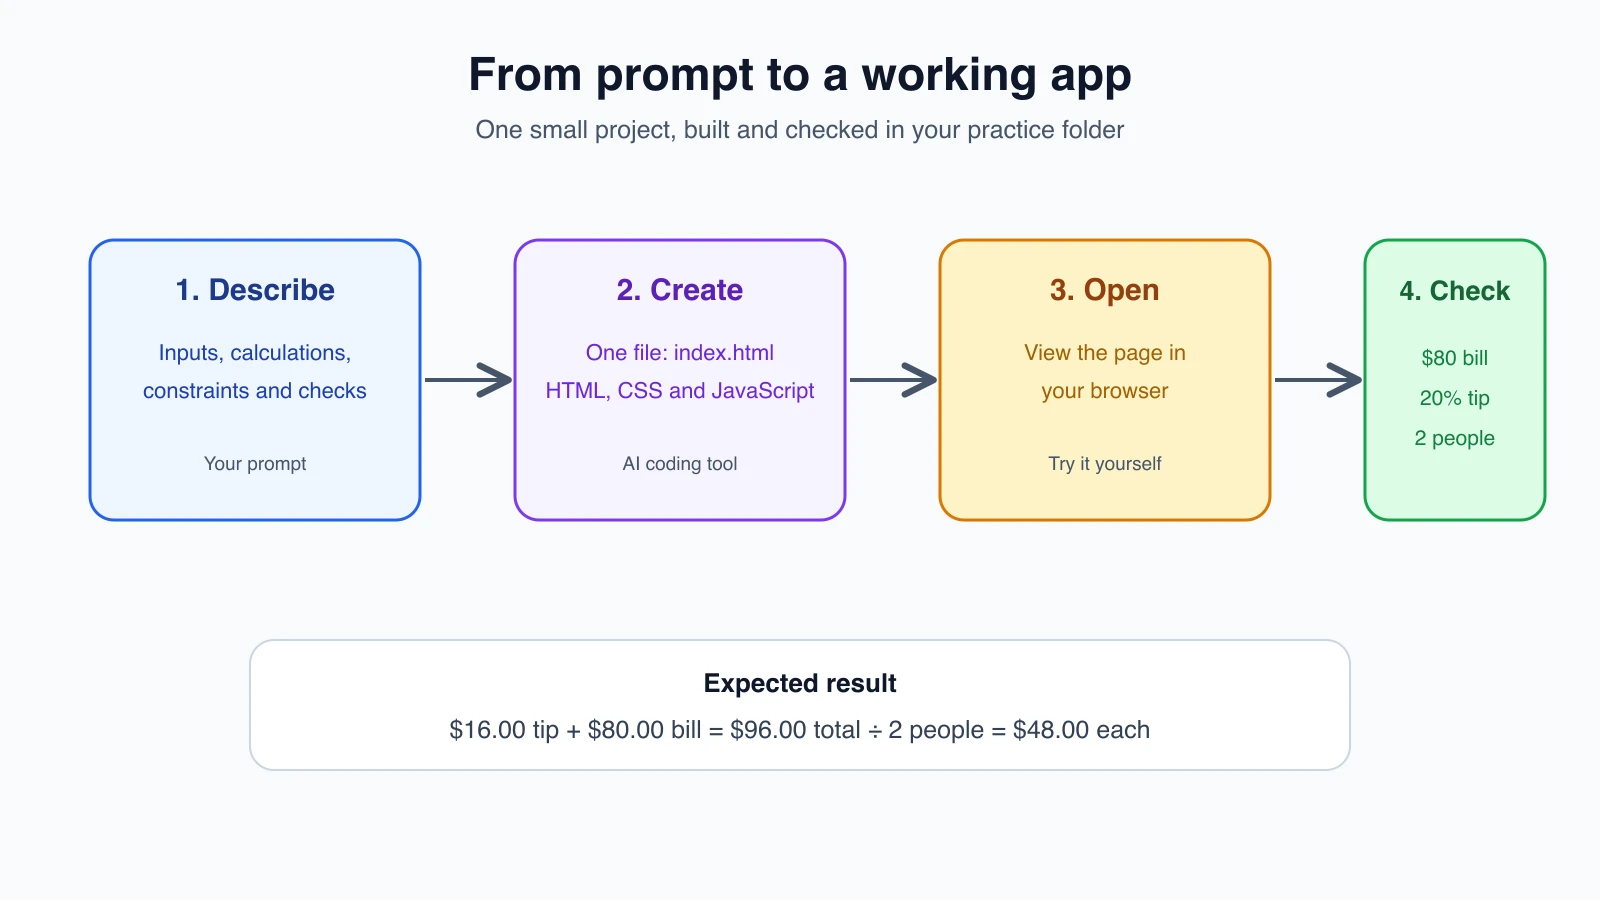
The app we are making
The calculator will take a bill amount, a tip percentage and a number of people. It will show the tip, the total bill and the amount each person pays. It will also reject blank or invalid amounts instead of silently showing a misleading result.
We will make one file called index.html with HTML (the page structure), CSS (the visual style) and JavaScript (the calculations and button behavior). A simple page like this does not need a database, account or paid service. You can open the file in your browser without setting up a web server.
Step 1: Ask for a small, complete version
Open your vibe-coding-practice folder in your coding tool. If you are using Claude Code in the terminal, start it from inside that folder so it works on the practice project. Then send a prompt like this:
1Create a working tip calculator in one file named index.html. Use only HTML, CSS and plain JavaScript. Do not add dependencies, a framework, a server, sign-in or a database.
2
3The page should let me enter a bill amount, choose a tip percentage from 10%, 15%, 18% or 20%, and enter the number of people splitting the bill. Show the tip amount, total bill and amount per person. Format money to two decimal places.
4
5Validate the inputs. The bill must be a number greater than zero. The number of people must be a whole number greater than zero. If an input is invalid, show a clear message and do not show a misleading total. Give the input fields visible labels, make the buttons easy to use on a phone, and include a way to reset the calculator.
6
7Before you finish, explain what you created and how I can open it in a browser. Do not install anything or run commands unless you ask me first.
This prompt gives the tool a goal, the inputs and outputs, boundaries, and a way to tell whether the result is useful. It asks for one file and rules out extra services we do not need for this exercise. The response or code it produces depends on the tool, so treat the prompt as a starting point, not a guarantee.
The example interaction in this lesson is illustrative. It shows the steps to follow, not a recording of a particular AI tool's output.
Step 2: Read the summary before opening the app
When the tool says it is done, look at its summary. Check that it created index.html and did not add package files, dependencies or unrelated features. Ask it to explain the parts of the file in plain language. For example:
1Explain how the tip amount and per-person total are calculated. Point me to the parts of index.html that validate the bill and number of people. Do not change the file.You do not need to understand every line yet. You should be able to describe what information you enter, what the app calculates and how it responds to an invalid value. If the explanation does not make sense, ask a more specific question before moving on.
Step 3: Open it and check the result
Open index.html from your file manager. It should open in your default browser. If you are using an app builder, use its preview instead. Look at the page before you test the numbers: can you tell what to enter and where the result appears?
Now try this example:
| Input | Value |
|---|---|
| Bill | $80.00 |
| Tip | 20% |
| People | 2 |
The app should show a $16.00 tip, a $96.00 total and $48.00 per person. The arithmetic is $80 × 0.20 = $16, then ($80 + $16) ÷ 2 = $48.
Try a few more cases: change the tip to 10%, enter 0 for the number of people, and leave the bill blank. The first change should recalculate the amounts. The invalid inputs should show a clear message instead of a plausible-looking answer. Also try resetting the form and narrowing the browser window to see whether the controls still fit.
Step 4: Ask for one fix
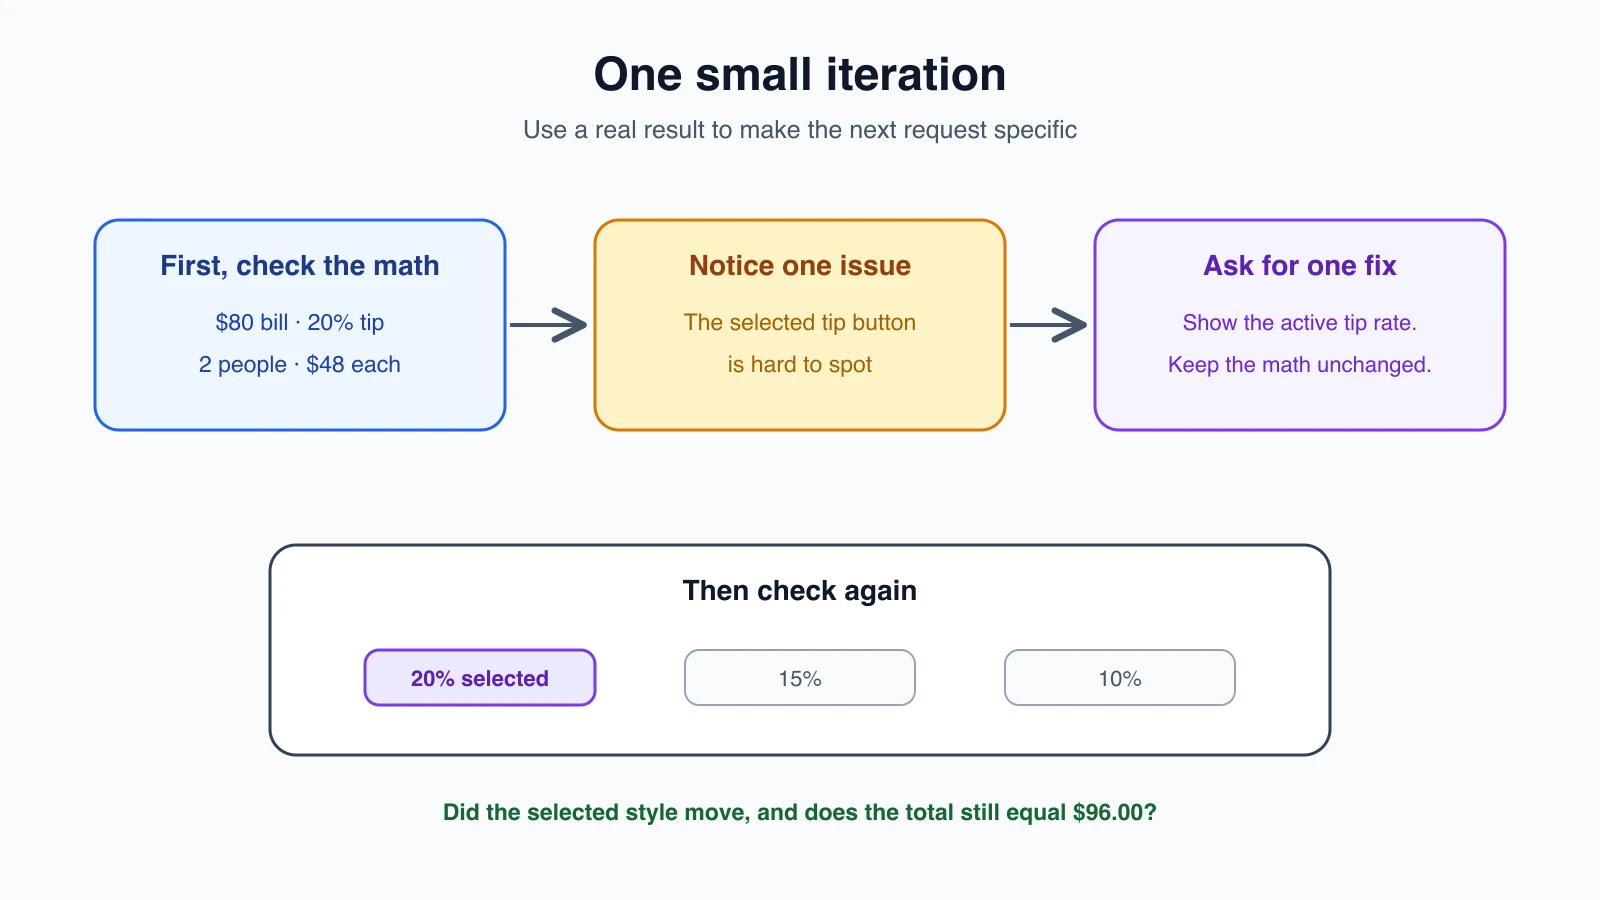
Suppose the calculation is right, but you cannot tell which tip button is selected. Ask for that one improvement:
1When I select a tip percentage, make that button look selected so I can see which rate is active. Keep the current calculations and layout. Do not change anything else. Tell me which part of index.html you changed.Reload the page and try each tip button. Check that the selected style moves to the button you clicked and that the math still changes. If the result is different from what you meant, describe what you observed and ask for a focused correction. This is the loop in practice: make a small request, try the result and decide what to do next.
Step 5: Save a first checkpoint
If the calculator works and you are happy with it, save the current version using Git. A commit is a named checkpoint in your project's change history. If Git has not been initialized in this practice folder yet, open a terminal there and run:
1git initThen save the file in a commit:
1git add index.html
2git commit -m "Build first tip calculator"
Git may ask you to set your name and email the first time you commit. Follow the setup instructions from Set up your workspace. This commit stays on your computer; you do not need to publish the app or upload it to GitHub.
If your tool offers to make a commit, you can ask it to explain the command first. Check the files it plans to include. For this exercise, the commit should contain the index.html you just checked, not unrelated files from elsewhere on your computer.
If the first result is not right
That is normal. Do not throw a second huge prompt at it. Say what you did and what you saw: “I entered $80, chose 20% and set two people. The result says $40 per person, but I expected $48. Please check the calculation and explain the fix before changing the file.”
If the tool proposes adding a framework, service or extra files, ask why they are necessary for this one-file exercise. If you cannot tell what a change does, ask it to explain before approving it. You can also return to the last saved version if a later change breaks the working app.
What this small exercise teaches
The tip calculator is deliberately plain. It lets you practice the whole loop on something you can finish in half an hour: describe, read the summary, open the result, check it against numbers you worked out yourself, ask for one fix and save a checkpoint. Notice how much easier it is to spot a mistake when you already know the right answer. That is the habit to carry into bigger projects: before you ask for a feature, decide how you will know it is right.
Mistakes beginners make
- Asking for a full product in one prompt. Keep the first app to one page and one job.
- Taking “it works” on trust. Use the sample numbers and check the result yourself.
- Testing only the expected inputs. Try blank, zero and invalid values too.
- Accepting unrelated setup. A one-file calculator does not need sign-in, a database or a deployment service.
- Committing without checking the file list. Save only the practice app you meant to keep.
Recap and try it yourself
You have used the complete build loop on a low-risk app: describe one outcome, read what the AI changed, run it, check its behavior, ask for one improvement and save a checkpoint. The app can be simple; the habit is what you will reuse.
Try one extra change, such as adding a “No tip” option. Before asking the AI, write down what should happen when you select it and how you will check the result. In From idea to MVP, you will use the same approach to turn an idea into a small plan for BookmarkBox.