
Vibe Coding course · lesson 14 of 26
- 1What Is Vibe Coding? A Beginner's Guide
- 2The Vibe Coder Mindset: Build Small, Check Often
- 3Choosing Your Vibe Coding Tool: A Beginner's Guide
- 4Set Up Your Workspace for Vibe Coding
- 5Your First Vibe-Coded App in 30 Minutes
- 6From Idea to MVP: Plan a Small First Version
- 7Spec-Driven Development: Give AI a Clear Plan to Build From
- 8Mockups and Examples as Input: Show AI What You Mean
- 9Choose a Tech Stack: Pick Tools You Can Keep Using
- 10Prompts That Build Things: Give AI a Clear Task
- 11Context Documents: Give AI Lasting Project Instructions
- 12Managing Context and Sessions: Keep AI on the Right Task
- 13Set Standards Early and Review AI Output
- 14Build the Skeleton: Start the BookmarkBox App
- 15Add Data and a Database: Save Real Bookmarks
- 16Add Accounts Safely: Sign In and Protect Each User's Data
- 17Design and Polish: Improve the App One Pass at a Time
- 18Version Control with AI: Keep a Safe History of Your Work
- 19Debugging with AI: Find the Cause Before You Fix It
- 20Test by Default: Make Sure Each Feature Keeps Working
- 21Refactor and Keep Your Code Healthy
- 22Security for Vibe Coders: Protect Your App and Its Users
- 23Deploy Your App: Put BookmarkBox Online
- 24Monitor and Maintain Your App After Launch
- 25Where Vibe Coding Stops: Know When to Change Your Approach
- 26Capstone: Ship a Project from Idea to Production
After this lesson, you will be able to create the BookmarkBox project, run its starter page on your computer, recognize the main files and ask an AI coding tool to make a small first screen. We will not add a database or sign-in yet. First, get a simple project running and understand where its pieces live.
In Set standards early and review the output, you learned to check the first files an AI changes. Now you will use those habits with BookmarkBox.
Create the project
Use the same project stack you wrote down in Choose a tech stack: Next.js, TypeScript and Tailwind CSS. The current Next.js installation guide recommends creating an app with create-next-app. Its recommended defaults include TypeScript, ESLint, Tailwind CSS, App Router and an AGENTS.md file for coding-agent guidance. Prompts can vary by release, so follow the current setup screen if yours differs. These setup details were checked in the official Next.js installation guide on November 3, 2026.
Open a terminal in the parent folder where you keep projects and run:
1npx create-next-app@latest bookmarkboxWhen asked whether to use the recommended defaults, choose yes. If the CLI asks you to choose a package manager, select npm if that is what you installed in Set up your workspace. Let the setup finish, then move into the new project:
1cd bookmarkbox
2npm run dev
Open the local address printed in the terminal, usually http://localhost:3000. You should see the starter page. This page is running on your computer; other people cannot visit it unless you later deploy it.
If the command fails, read the first useful error message and check the installed Node.js version against the current Next.js requirements. Do not ask the AI to reinstall everything before you understand what failed. The workspace setup lesson covers checking Node and npm.
Recognize the project files
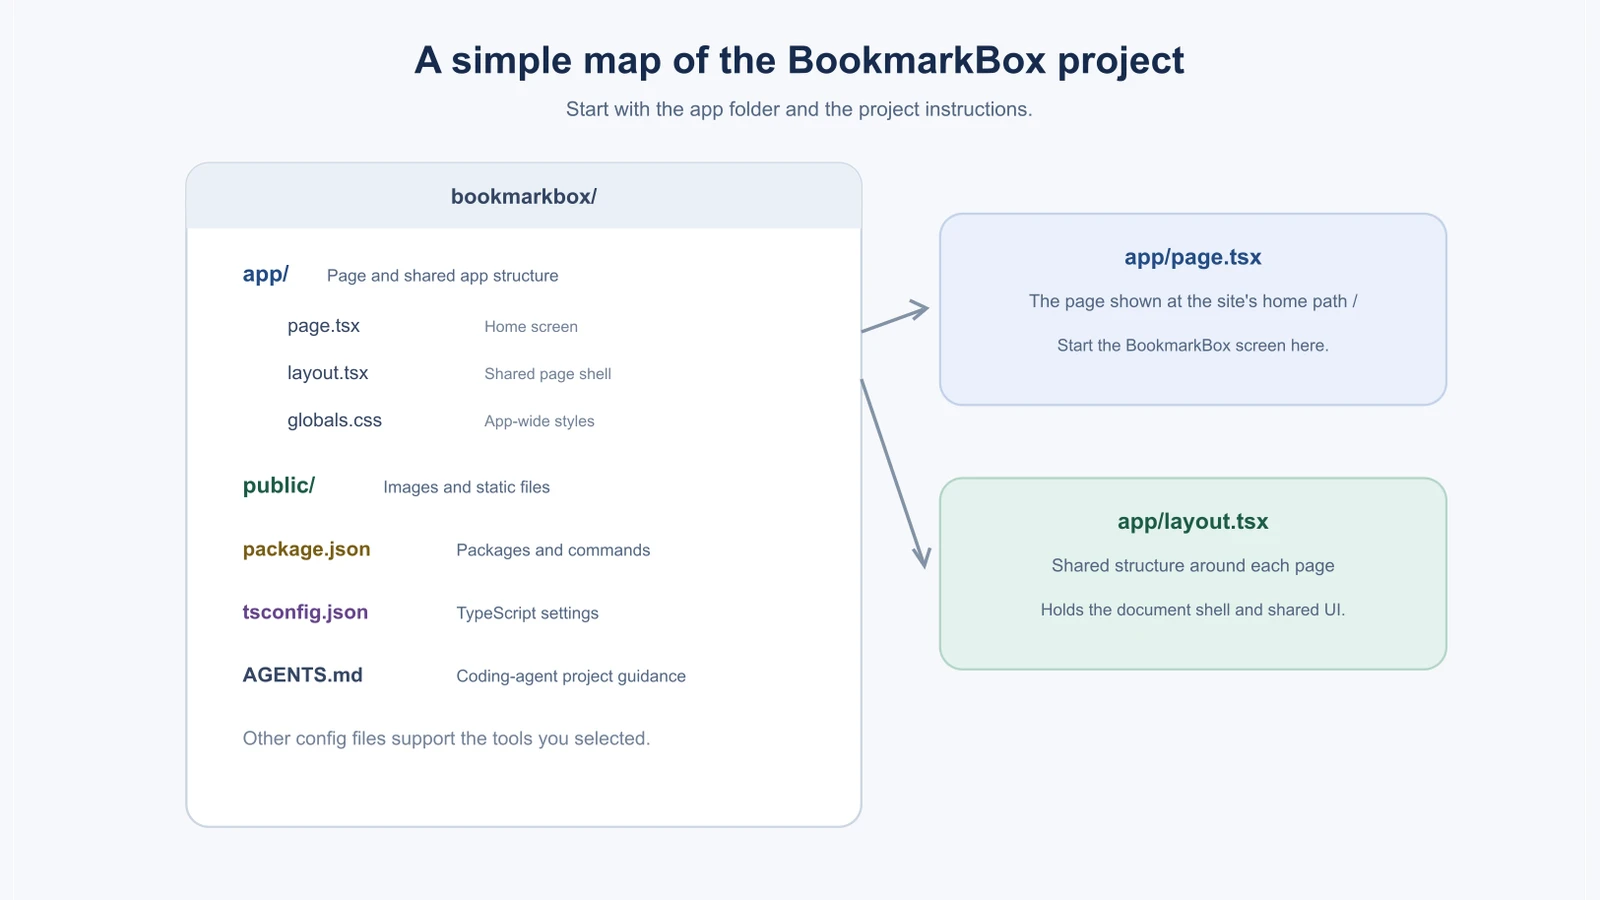
The starter includes many files because a web app needs configuration as well as pages. Start with the handful you will see often:
| File or folder | What it is for |
|---|---|
app/page.tsx | The page shown at the site's home address / |
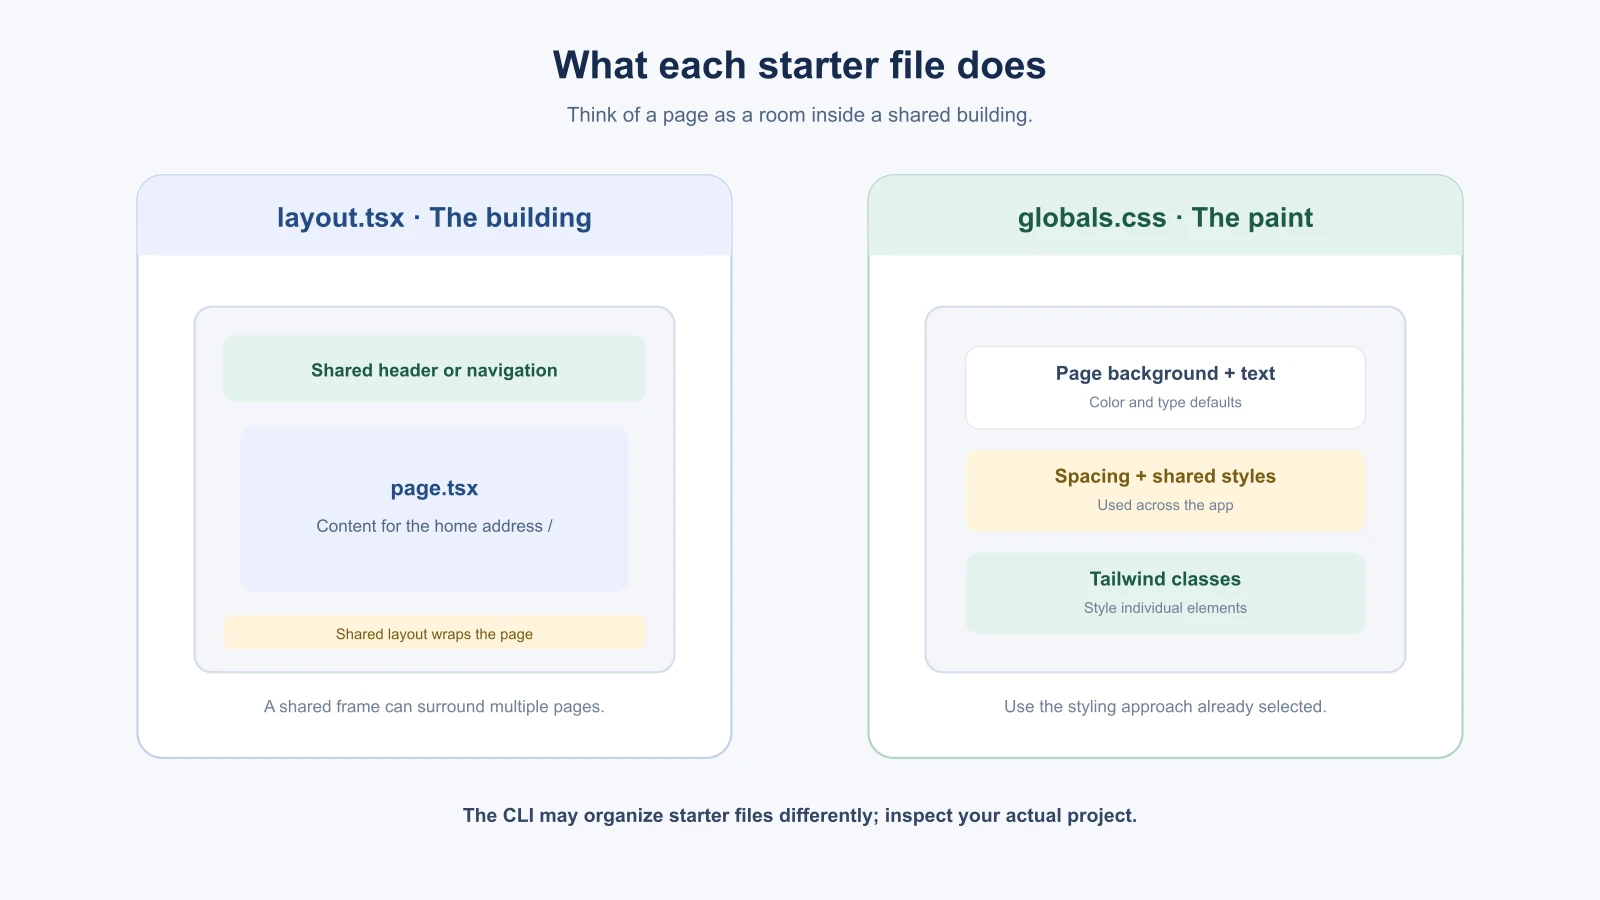
app/layout.tsx | Shared outer structure around pages, such as the document shell and shared styles |
app/globals.css | Styles that apply across the app; starter projects may name or organize styles differently |
public/ | Static files such as images and icons |
package.json | Project scripts and the list of installed packages |
tsconfig.json | TypeScript settings for the project |
AGENTS.md | Project guidance for coding tools that support this file |
The app folder uses file-based routing: its special files tell Next.js which page and shared layout to show. You do not need to memorize every file today. Keep the Next.js project structure guide nearby, and ask the AI to explain a file before letting it replace one.
Give AI one first-page task
Before editing, check that the project starts and that the current files are saved. Then ask your coding tool to inspect the project and replace the starter page with a simple BookmarkBox landing screen. The first screen can have the app name, a short explanation and a visible placeholder for where saved links will go. The form and real save behavior come in the next build lessons.
1We are starting the BookmarkBox app. Read the project instructions and the current BookmarkBox plan/spec first.
2
3Inspect the existing Next.js project and tell me which files control the home page, shared layout and global styles. Then propose a short plan to replace only the starter home page with a simple, responsive BookmarkBox screen.
4
5The screen should show the name “BookmarkBox,” explain that it helps people save useful links and find them again, and include a clearly labeled placeholder section for the saved-links list. Do not add a database, sign-in, tags, search or real save behavior yet. Keep the current Next.js, TypeScript and Tailwind setup.
6
7Wait for my approval of the plan before editing. After the change, explain what changed by file and tell me how to view it locally.
If your tool cannot pause for approval in the same way, use its read-only or planning mode first. Review its plan, then ask it to make the change. Read the diff, start or refresh the local page and check that the result still has the agreed purpose and scope.
Save a clean checkpoint
When the starter runs and the first page looks right, save a Git checkpoint. A commit is a named snapshot of the project that you can return to later. Before committing, look at the changed file list and diff so you know what is included. If GitHub is not set up yet, a local commit is still useful; you can connect a remote later.
For example, a commit message might be:
1Create BookmarkBox starter pageAlso update the project's context document if this session revealed a durable instruction, such as a confirmed command or styling convention. Keep one-time implementation details in the spec or commit message instead.
What the terminal is telling you
When you run npm run dev, the terminal prints a few lines and then stays busy. That is normal. The command starts a development server, a program on your computer that serves your app to your browser while you work. It keeps running until you stop it.
Look for the address the terminal prints, usually http://localhost:3000. Localhost means “this computer,” so only you can open it. If something else on your computer is already using that port, the tool may pick a different one. Use the address the terminal shows, not the one you expect.
While the server runs, most changes you save appear in the browser automatically, without a manual restart. If the page looks stale, refresh it. To stop the server, click in the terminal and press Ctrl and C together. Keep the server running in one terminal window and use another for other commands.
Change one thing yourself first
Before you ask an AI to edit the starter page, make one tiny change by hand. It takes a minute and builds a mental model that will help you review the AI's work.
- Open
app/page.tsxin your editor. - Find a line of visible text on the starter page and change a few words.
- Save the file and look at the browser. The text should update.
- Undo the change, or keep it if you like it.
Now you have seen the whole loop from file to browser without any tool in between. When an AI changes five files later, you know what “a file changed and the page updated” means.
Common first-run problems
Setup problems are normal. Read the first useful error message before asking for help, because it often names the cause.
| What you see | A likely cause | What to try |
|---|---|---|
command not found for npx or node | Node.js is not installed, or the terminal was opened before installing it | Install Node.js as described in the workspace lesson, then open a new terminal and check node --version |
| An error mentioning the Node.js version | The installed version is older than the project needs. Next.js's installation guide listed a minimum Node.js version of 20.9 when this lesson was written, so check the current guide | Install a current LTS version of Node.js and try again |
| The page does not open at the address you expected | The server started on a different port, or it is not running | Read the address in the terminal, and check that the server is still running |
| A permissions error while installing | The folder or package location is not writable by your user | Do not reach for administrator commands blindly. Read the message and check the tool's current docs |
| A network error during setup | No connection, a firewall or a proxy | Check your connection and try again |
If you are stuck, copy the first error message into your search or your AI tool along with the command you ran, and ask for an explanation before it makes changes. The aim is to understand what failed, not to try random fixes.
Ask the AI to explain a file
A good way to learn the starter project is to ask a coding tool to teach you, not to change anything. For example:
1Do not edit any files. Explain `app/layout.tsx` to someone who has never seen a Next.js project. What is each part for? What would change on screen if I edited it? Which parts should I leave alone for now?A good answer names the purpose of each part, connects the code to what you see in the browser, and says what is safe to change. If the explanation is full of unfamiliar words, ask for a simpler version and one example. If it contradicts what the Next.js documentation says, trust the documentation and ask the tool to reconcile the two.
A note on this project
As in From idea to MVP, remember that BookmarkBox is a guided project. The setup commands in this lesson come from the official Next.js documentation, but the files your AI tool writes will differ from any example, and this course does not include a tested copy of the finished app. Judge your version against the spec and the checks, not against someone else's code.
Mistakes beginners make
- Adding the database before the first page runs. Build in small checkpoints so setup problems stay easy to find.
- Letting the AI replace every starter file. Ask which files it needs and keep the first change narrow.
- Confusing localhost with a public website. A local development server is visible on your computer only.
- Deleting configuration because it looks unfamiliar. Ask what a file does before removing it.
- Adding placeholder controls that imply unfinished behavior works. Label placeholders clearly and do not present them as functional features.
- Skipping the first checkpoint. Save the working starter before the app grows.
Recap and try it yourself
Create the project with the current Next.js setup, run it locally, learn the main folders and make one small first-page change. Review the files and behavior, save a Git checkpoint and update project guidance only with useful lasting facts.
Try it: create the BookmarkBox starter and ask an AI to explain app/page.tsx, app/layout.tsx and package.json in plain language. Then make the simple landing screen, check it in your browser and save a local commit. In Add data and a database, you will give BookmarkBox a real place to store links.