
Good results from Claude Code come less from clever wording and more from giving it the right information. This lesson shows you the patterns that work. After it, you will write prompts that save you rounds of correction, know how to hand Claude files and screenshots, and know how to get it to prove its work.
You do not need to memorize templates. The goal is a habit of asking yourself one question before you press Enter: what does Claude need to know that it cannot find on its own?
The main idea: tell Claude what it cannot see
When you give Claude a task, it starts by reading your code. It is very good at this. It finds your file layout, your naming habits, your test setup and how existing parts are built, usually faster than you could explain them. So you do not need to describe what is already written down in the project.
What Claude cannot find is anything that is not in the code:
- A decision your team made in a meeting
- What "fixed" means to you for this task
- A preference between two reasonable approaches
- How much you want built
Your prompt is the place for those things. A quick test before you type a detail: could Claude find this by reading the code, and would it actually go and look? If both answers are yes, leave it out.
Pattern 1: be specific
A specific prompt works because it hands Claude information it does not have. Name the place, describe the symptom, and say what done looks like.
| Instead of | Try |
|---|---|
| fix the login bug | users report login fails after the session times out. look at token refresh in src/auth/, write a failing test that reproduces it, then fix it |
| add a calendar widget | follow the pattern in HotDogWidget.php and build a calendar widget that lets you pick a month and page between years. no new libraries |
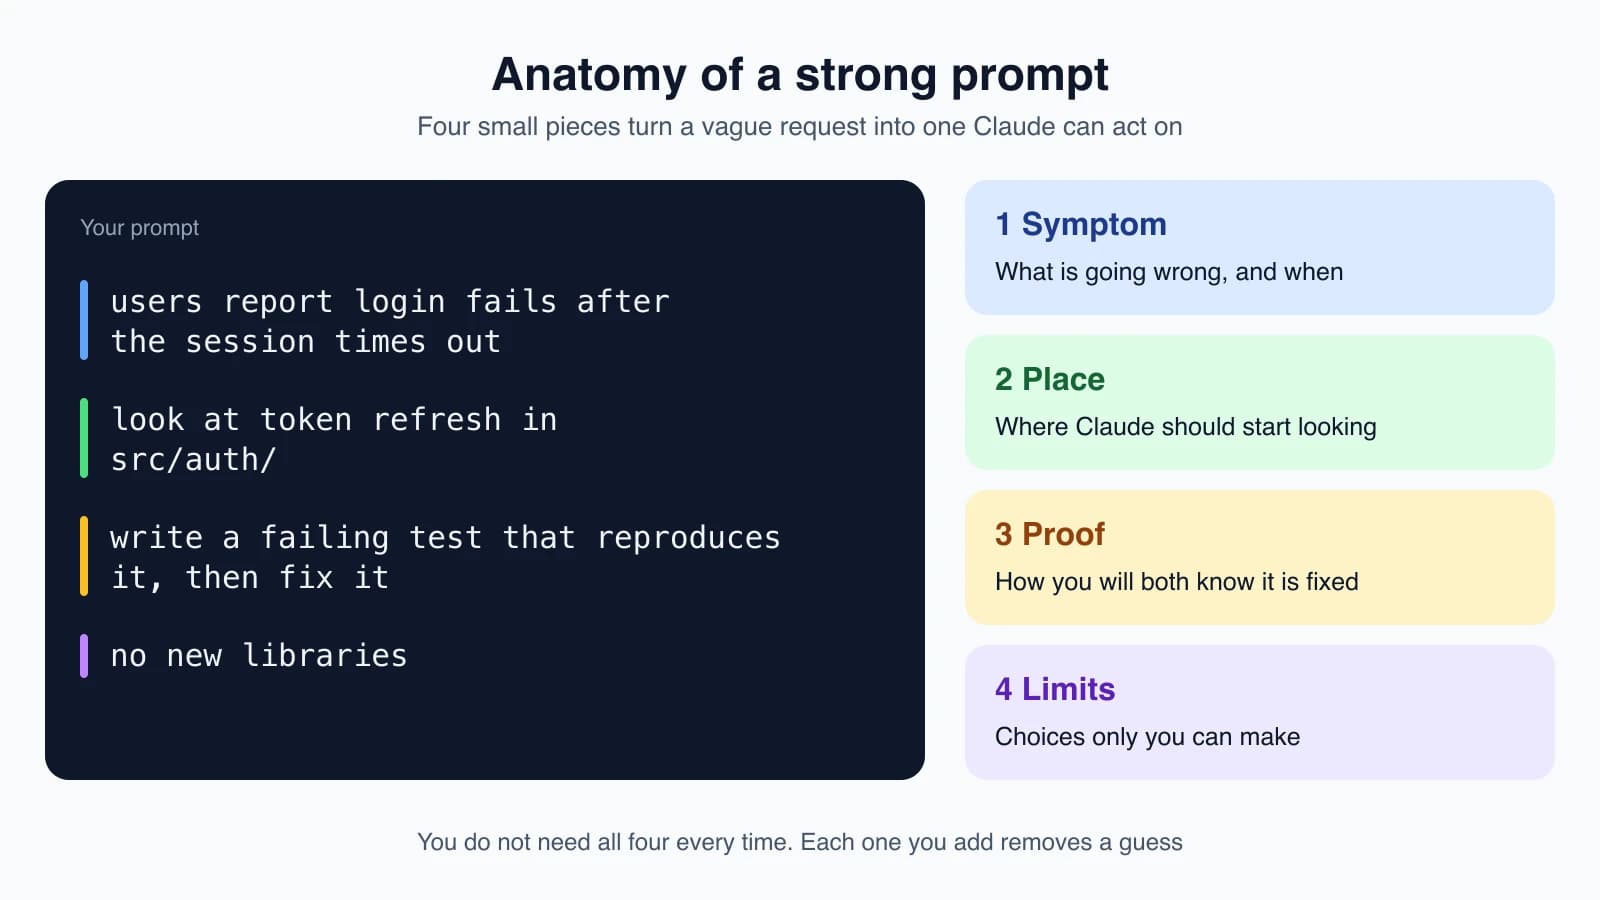
A strong prompt usually has four pieces. The symptom says what is going wrong and when. The place tells Claude where to start looking. The proof says how you will both know it is fixed. The limits are choices only you can make, such as "no new libraries". You rarely need all four, but each one you add removes a guess.
Pattern 2: hand over the thing, do not describe it
If you already have the file, the screenshot or the error, give it to Claude directly.
A file. Type @ and start a path. Claude Code autocompletes it and includes the file's contents:
1explain how @src/auth/refresh.ts decides when a token has expiredAn image. Paste a screenshot of a design or an error into the prompt. On most systems that is Ctrl + V, which lesson 4 covered.
Command output. Pipe it in from your shell with the -p flag, which runs a single query and prints the answer:
1cat error.log | claude -p "what's going on here"Showing the real thing beats a paraphrase, because the details you would leave out are often the ones that matter.
Pattern 3: show a pattern to follow
Claude reads your code, so you can point at an existing example and say "like this". This is the fastest way to get code in your project's style:
1add a Settings page that follows the same structure as @src/pages/Profile.tsxNaming an example also settles questions of layout, naming and libraries without you spelling them out.
Pattern 4: give Claude a way to check its work
This is the highest-value habit in the lesson. If Claude can check its own work, it can find and fix its own mistakes. If it cannot, you become the checker.
The check can be almost anything Claude can read the result of: a test file, the exit code of a build, a linter, a script that compares output to an expected file, or a browser screenshot next to a mockup. If your project already has one, the most useful line in your CLAUDE.md is the command that runs it.
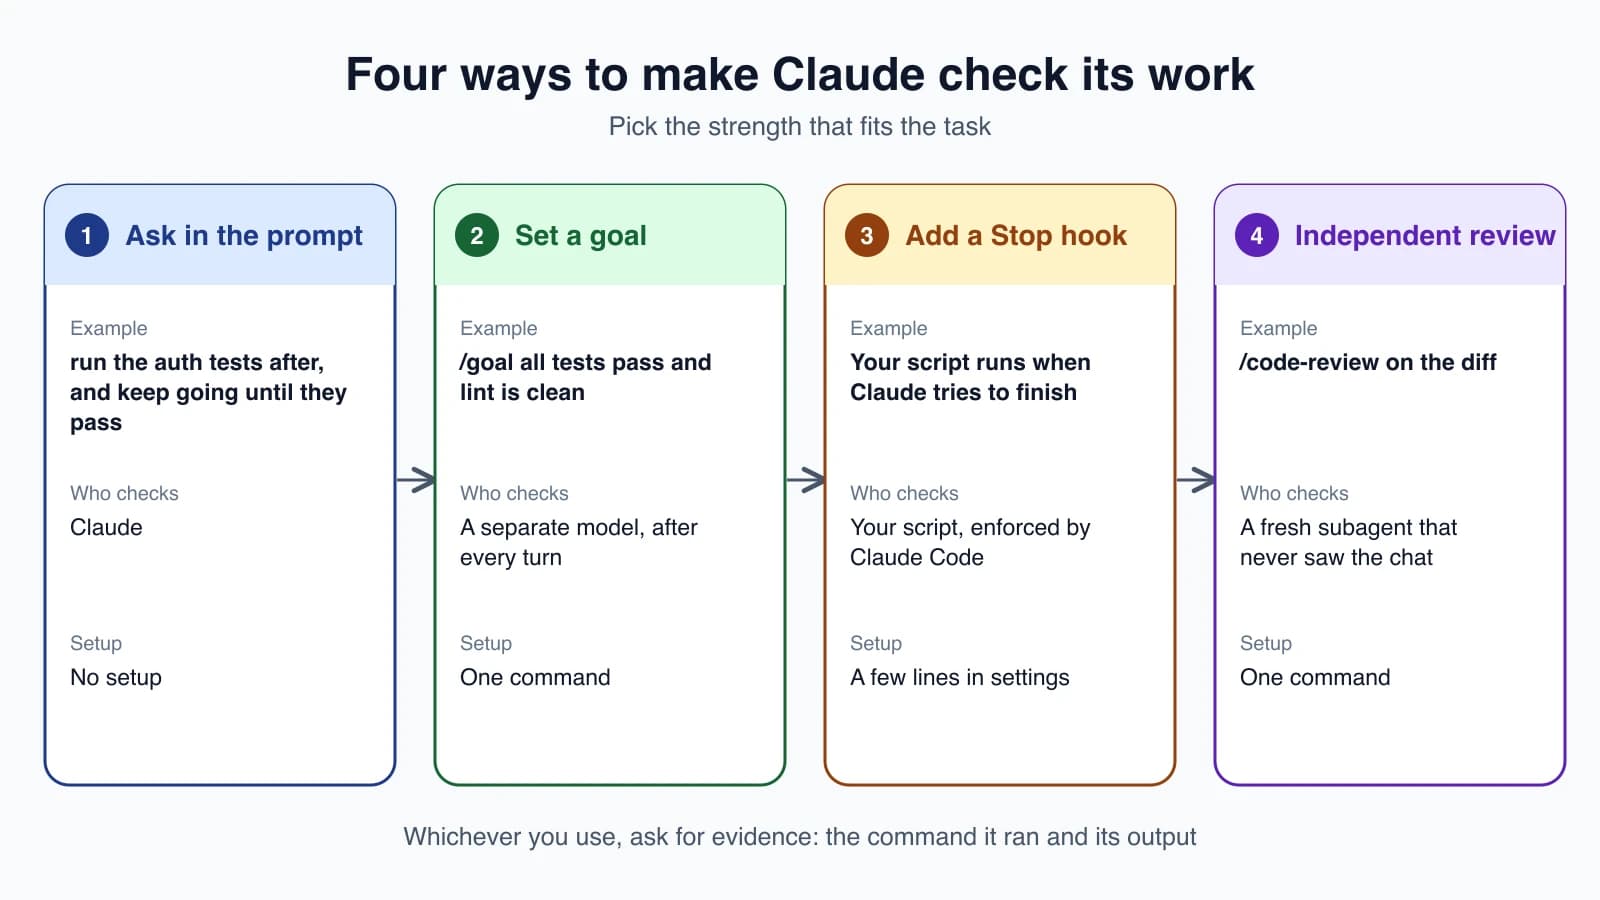
You can choose how strict the check is:
- Ask in the prompt. "Run the auth tests after, and keep going until they pass." Claude decides for itself when it is satisfied. This works today with no setup.
- Set a goal.
/goal all tests in tests/auth pass and lint is cleansets a condition that a separate model checks after every turn. It matters most for long background runs. - Add a Stop hook. A hook runs your script whenever Claude tries to finish, and sends Claude back to work if the script fails. Claude Code enforces this one, so the turn cannot end until the check passes. Lesson 18 covers hooks.
- Get an independent review.
/code-reviewreviews your changes in a fresh subagent that never saw your conversation, so it is not swayed by the reasoning that produced the code.
Whichever you pick, ask for evidence: the command Claude ran and its output, or a screenshot. "All tests pass" on its own tells you very little. Reading the output is faster than rerunning the check yourself.
Pattern 5: control the scope
Claude tends to read a request conservatively and build the smallest thing that satisfies it, because it cannot see how much you were hoping for. Say so when you want more:
1build the settings page from the mockup. be ambitious: empty and error states, the save flow wired up, keyboard navigation, not just the layoutThat tells Claude about scope, which only you know. The opposite also works. When a task is big or risky, ask for one small step at a time, as you saw in lesson 3.
Pattern 6: explore, plan, then build
Before a big change, let Claude learn the code. Ask questions first, switch to plan mode (lesson 7), then build. This lets you fix a misunderstanding while it is still cheap.
When you do not know what you want
Sometimes the problem is that you have not decided. Ask Claude to interview you:
1I want to add rate limiting to the public API but haven't thought it through yet. Interview me until you could write the spec, then write it to SPEC.md.Claude asks about the parts you have not pinned down, such as per-user versus per-key limits and what happens to requests over the limit. When it is done you have a written spec. Start a fresh session to build from it, so the build begins with a clean context and a clear definition of done.
Pattern 7: iterate, and describe what you see
The first answer is rarely the last, and that is fine. When something is wrong, tell Claude what you observed instead of guessing at the cause:
1the button appears but nothing happens when I click itSay what you saw, what you expected, and any error text. Claude can then investigate the real cause. You do not need to start over. Correct in small steps and keep going.
What you can stop doing
Some habits from older models no longer help.
- Magic phrases. "Think step by step" and "be thorough" are just ordinary words. How hard Claude thinks is mostly controlled by the effort level from lesson 5. Wording can still nudge it a little, but it will not push past the setting.
- Writing down what Claude can read. A prompt or
CLAUDE.mdfull of facts that are visible in the code only adds noise. - Emphasis. If you keep adding IMPORTANT to a line and Claude still misses it, the line is probably a rule that cannot have exceptions. Those belong in a hook or a permission rule, not in a prompt. Lessons 8 and 18 cover them.
Vague prompts have their place too. When you are exploring, something like "what would you improve in this file?" is fine. You will correct a bit more as you go, and that is the trade-off.
Mistakes beginners make
- Describing the fix, not the problem. If you are not sure of the cause, say what you see and let Claude find it.
- Pasting a lot of background Claude can read itself. Point at the file with
@instead. - Accepting "done" with no proof. Ask for the command and the output.
- Packing ten requests into one prompt. You cannot easily check ten things. Do one, check it, continue.
- Hoping a prompt will enforce a rule. A prompt is guidance. For a rule with no exceptions, use a hook or a deny rule.
Quick recap
- Tell Claude what it cannot find by reading the code: decisions, preferences, scope and what done means.
- A strong prompt names the symptom, the place, the proof and the limits.
- Hand over files with
@, paste screenshots, and pipe in command output. - Point at an existing example to get code in your project's style.
- Give Claude a check to run, and ask for evidence.
- Interview first when you are unsure, and correct in small steps.
Try it yourself
Pick one small change in your practice project and write it two ways. First write a vague prompt, such as "improve the homepage". Then rewrite it with a symptom or goal, a place, a proof and a limit. Run both, and compare how many corrections each one needed. For the second, end with "show me the command you ran to check it and its output".
Next lesson: debugging, refactoring and writing tests with Claude Code.